Crdroid Recoveryimg Install 〈Top〉
Installing a crDroid recovery image requires an unlocked bootloader and a PC equipped with Android SDK platform tools. crDroid recovery is a lightweight, specialized tool designed perfectly to handle the installation and maintenance of crDroid custom ROMs.
Because installation steps can vary depending on your device's partition layout (such as dynamic partitions or A/B slots), always verify your specific model's requirements on the crDroid Devices Portal. 🛠️ Prerequisites
Backup everything: This process completely wipes your internal storage.
Unlock the bootloader: Your phone must have an unlocked bootloader to accept custom images.
Enable Developer Options: Go to Settings > About Phone and tap Build Number 7 times.
Toggle USB Debugging: Turn it on inside the newly visible Developer Options menu.
Get Platform Tools: Download the official Google Android SDK Platform Tools for your PC.
Acquire the files: Download your phone's specific recovery.img (or boot.img/vendor_boot.img if prescribed by crDroid) and the crdroid.zip OS package from the official crDroid Download Section. 💻 Step 1: Boot to Fastboot Mode
Connect your phone to your PC with a high-quality USB cable.
Open a command prompt or terminal inside your extracted platform-tools folder. Reboot your device into fastboot by typing: adb reboot bootloader Use code with caution. Copied to clipboard Confirm your PC recognizes the phone by running: fastboot devices Use code with caution. Copied to clipboard (If a random serial code pops up, you are ready to proceed) ⚡ Step 2: Flash the crDroid Recovery Image
The precise command depends heavily on your device architecture. Identify which command fits your specific phone: For standard devices with a recovery partition: fastboot flash recovery recovery.img Use code with caution. Copied to clipboard For newer devices using boot or vendor_boot for recovery:
(Refer to your device's specific guide on the crDroid device list to see which partition handles the recovery image) fastboot flash boot recovery.img Use code with caution. Copied to clipboard or fastboot flash vendor_boot recovery.img Use code with caution. Copied to clipboard 📲 Step 3: Boot into crDroid Recovery
Do not allow your phone to boot back into its original operating system after flashing, or the stock OS will overwrite your newly installed recovery. Unplug the cable or use physical buttons.
Hold Volume Up + Power (or your device's specific physical button combo) until the phone vibrates and launches the crDroid recovery interface. 💾 Step 4: Install the crDroid ROM
Once you are successfully inside the crDroid recovery, you can officially install the operating system. How to install crDroid 11 for Redmi Note 10 Pro/Max (sweet)
How to Install crDroid Recovery: A Step-by-Step Guide If you are looking to install crDroid, one of the most popular and customizable custom ROMs in the Android community, you’ve likely noticed that many modern builds recommend using the official crDroid Recovery instead of the traditional TWRP or OrangeFox.
Installing the recovery.img correctly is the "make or break" step for a successful ROM flash. In this guide, we’ll walk through exactly how to install crDroid recovery on your device to ensure a clean, stable installation. Why Use crDroid Recovery?
While TWRP is a legend in the scene, many newer Android versions (Android 12, 13, and 14) use a virtual A/B partition system. This can make TWRP buggy or unable to decrypt data. crDroid Recovery is specifically designed to: Handle the exact partition layout of crDroid ROMs. Provide seamless OTA (Over-The-Air) updates.
Reduce the risk of "bootlooping" during the installation process. Prerequisites Before you start, make sure you have the following ready:
Unlocked Bootloader: This is mandatory. You cannot flash a recovery image on a locked device.
Platform Tools: Download the latest ADB and Fastboot tools for your PC.
USB Drivers: Ensure your PC recognizes your phone in Fastboot mode (especially important for Windows users).
The recovery.img File: Download the specific recovery file for your device model from the official crDroid website. Step 1: Prepare Your Device and PC
On your phone, go to Settings > About Phone and tap Build Number 7 times to enable Developer Options. crdroid recoveryimg install
Go to Settings > System > Developer Options and enable USB Debugging. Connect your phone to your PC.
Open your Platform Tools folder, hold Shift + Right Click, and select Open PowerShell window here (or Command Prompt). Step 2: Boot into Fastboot Mode In your terminal, type: adb reboot bootloader Use code with caution.
Your phone will reboot to a screen (usually with a robot or text) that says FASTBOOT. To verify the connection, type: fastboot devices Use code with caution. If you see a serial number, you’re ready to proceed. Step 3: Flash the crDroid Recovery Image
The command you use depends on whether your device has a dedicated recovery partition or uses the boot partition. Option A: For devices with a Recovery Partition Most older or specific "A-only" devices use this: fastboot flash recovery recovery.img Use code with caution.
(Note: Replace "recovery.img" with the actual name of the file you downloaded, or rename the file to recovery.img for simplicity.)
Option B: For A/B Partition devices (Common in newer phones)
Newer devices often don't have a "recovery" partition; the recovery lives inside the boot image. In this case, use: fastboot flash boot recovery.img Use code with caution. Step 4: Reboot into crDroid Recovery
Important: Do not reboot back into System (Android) yet, or the OS might overwrite the recovery you just flashed.
Use the Volume Buttons on your phone to navigate the Fastboot menu to "Recovery Mode" and press Power to select it. Alternatively, run: fastboot reboot recovery Use code with caution.
You should now see the purple/dark crDroid Recovery interface. Step 5: What to do next?
Now that you are in crDroid Recovery, you are ready to flash the ROM:
Factory Reset: Go to Factory Reset > Format data/factory reset. (This will wipe your phone!) Apply Update: Go to Apply update > Apply from ADB. Sideload ROM: From your PC, type: adb sideload crdroid_rom_name.zip Use code with caution. Troubleshooting Tips
"Command not found": If you are using PowerShell, try adding ./ before the commands (e.g., ./fastboot flash recovery recovery.img).
Waiting for Device: This usually means your drivers aren't installed correctly. Check Windows Device Manager to see if your phone is listed as "Android Bootloader Interface."
Verification Failed: Ensure you downloaded the recovery specifically for your device's codename (e.g., "alioth" for Poco F3).
By using the official crDroid recovery.img, you ensure that the internal scripts for your specific ROM build run exactly as the developers intended. Happy flashing! To help you get this right, let me know: What device model (and codename) are you using?
Which version of crDroid (e.g., v10, v11) are you trying to install? Are you currently on a custom ROM or the stock firmware?
I can provide the specific commands or download links tailored to your phone!
What is CRDroid?
CRDroid is a custom Android ROM that offers a clean, simple, and feature-rich experience. It's based on the Android Open Source Project (AOSP) and is designed to be compatible with various devices.
Why Install CRDroid Recovery.img?
Installing CRDroid recovery.img allows you to:
- Flash custom ROMs: With CRDroid recovery, you can easily flash custom ROMs, including CRDroid itself.
- Backup and restore: Create backups of your device and restore them when needed.
- Wipe data: Perform a full wipe of your device's data, cache, and dalvik cache.
- Fix bootloops: If your device gets stuck in a bootloop, CRDroid recovery can help you fix it.
Requirements
- A compatible Android device
- A computer with ADB and Fastboot installed
- A USB cable
- CRDroid recovery.img file (download from the official CRDroid website or forum)
Step-by-Step Installation Guide
- Enable Developer Options: Go to your device's Settings > About phone > Build number and tap on it 7 times to enable Developer Options.
- Enable OEM Unlocking: Go to Settings > Developer Options > OEM Unlocking and toggle it on.
- Boot into Fastboot: Reboot your device into Fastboot mode by holding the Volume Down and Power buttons simultaneously.
- Connect to Computer: Connect your device to your computer using a USB cable.
- Verify Fastboot Connection: Open a command prompt or terminal on your computer and type
fastboot devices to verify that your device is detected.
- Flash CRDroid Recovery.img: Type the following command to flash the CRDroid recovery.img:
fastboot flash recovery recovery.img
Replace recovery.img with the actual file name of the CRDroid recovery.img you downloaded.
- Reboot into Recovery: Once the flashing process completes, reboot your device into recovery mode by holding the Volume Up and Power buttons simultaneously.
- Navigate Recovery Menu: Use the Volume buttons to navigate the recovery menu and the Power button to select options.
Tips and Precautions
- Backup your data: Before installing CRDroid recovery, make sure to backup your important data to avoid losing it during the process.
- Use a compatible recovery.img: Ensure that you download the correct CRDroid recovery.img file for your device.
- Be cautious with fastboot commands: Double-check the commands you execute using fastboot to avoid causing damage to your device.
Installing the crDroid Recovery Image is a critical first step before flashing the crDroid ROM. This recovery replaces your phone's stock recovery environment, allowing you to "sideload" the operating system and other packages like GApps.
These video guides provide step-by-step visual walkthroughs for installing crDroid and its custom recovery on popular devices like the Poco F5 and Pixel series: How to Flash crDroid ROM [Android 14] on Poco F5
How to Install crDroid Recovery (recovery.img): A Step-by-Step Guide
If you are looking to install crDroid, one of the most popular performance-oriented custom ROMs, the first step is often setting up the dedicated crDroid Recovery. While many users are familiar with TWRP, using the official crDroid recovery image often ensures better compatibility with their specific update system and encryption handling.
This guide will walk you through the process of flashing the recovery.img to your device so you can get started with a clean crDroid installation. Prerequisites: Before You Begin
Installing a custom recovery involves modifying your device’s core partitions. Ensure you have the following ready:
Unlocked Bootloader: You cannot flash a recovery image if your bootloader is locked.
ADB & Fastboot Drivers: Installed on your PC (Windows, macOS, or Linux). USB Debugging: Enabled in your phone’s Developer Options.
The Correct Image: Download the specific recovery.img for your device model from the official crDroid website.
Backup Your Data: This process can lead to data loss. Back up everything important to the cloud or an external drive. Step 1: Prepare Your Environment
Once you have downloaded the recovery.img file, move it into the folder on your PC where your ADB and Fastboot binaries are located. For ease of use, rename the file to simply recovery.img.
Open a command prompt or terminal window in that folder. You can usually do this by holding Shift + Right Click in the folder and selecting "Open PowerShell window here" or "Open Command Prompt here". Step 2: Boot Into Fastboot Mode
Connect your device to your PC via a high-quality USB cable. In your terminal, type: adb reboot bootloader Use code with caution.
Your phone will restart into a screen (often showing a logo or "Fastboot Mode" text). To verify the connection, type: fastboot devices Use code with caution.
If you see a serial number followed by "fastboot," you are ready to proceed. Step 3: Flash the crDroid Recovery Image
The command you use depends on whether your device has a Recovery Partition or uses the Boot Partition for recovery (common in newer A/B partition devices). Option A: For devices with a dedicated recovery partition Type the following command: fastboot flash recovery recovery.img Use code with caution.
Option B: For devices without a dedicated recovery partition (A/B devices)
On newer phones, the recovery is part of the boot image. You will flash it to the boot slot: fastboot flash boot recovery.img Use code with caution. Step 4: Boot into crDroid Recovery
Once the flash is finished, do not reboot into the OS immediately, as some devices will overwrite the custom recovery with the stock one upon a normal reboot.
Use the volume buttons on your device to navigate the fastboot menu to "Recovery Mode" and press the Power button to select it. Alternatively, you can try: fastboot reboot recovery Use code with caution. You should now see the crDroid Recovery interface. Step 5: Finalizing (Factory Reset) Installing a crDroid recovery image requires an unlocked
Before installing the crDroid ROM itself, the recovery will usually require a clean slate: Select Factory Reset. Select Format data/factory reset. Confirm the action.
Your device is now prepared. From here, you can select Apply Update > Apply from ADB to sideload the actual crDroid ROM zip file using the adb sideload .zip command. Troubleshooting Tips
Device Not Found: Ensure you have the correct USB drivers installed. Try a different USB port (USB 2.0 is often more stable for fastboot than 3.0).
Bootloop: If your device gets stuck on the logo, ensure you formatted the data partition correctly in Step 5.
"Waiting for device": This usually means your PC doesn't recognize the phone in Fastboot mode. Check your Device Manager for "Android Bootloader Interface" errors.
By installing the crDroid recovery image, you’ve laid the groundwork for a faster, more customizable Android experience.
Are you planning to install GApps (Google Apps) alongside crDroid, or are you going for a de-googled setup?
Installing the crDroid recovery image is the essential first step to flashing the full crDroid ROM
. This custom recovery allows you to format data and sideload the ROM package onto your device. Prerequisites Unlocked Bootloader : Your device must have an unlocked bootloader. : Ensure you have ADB and Fastboot drivers installed on your PC. : Download the recovery.img vendor_boot.img
for some newer devices) specifically for your device model from the official crDroid download page Installation Steps 1. Boot to Fastboot Mode
Connect your phone to your computer via USB. Open a terminal or command prompt and type: adb reboot bootloader Use code with caution. Copied to clipboard Alternatively, power off your device and hold Volume Down + Power until "FASTBOOT" appears. 2. Verify Connection Ensure your computer recognizes the device by typing: fastboot devices Use code with caution. Copied to clipboard
You should see your device's serial number. If not, recheck your USB drivers. 3. Flash the Recovery Image
The exact command depends on your device's partition structure. Most standard devices use: fastboot flash recovery recovery.img Use code with caution. Copied to clipboard For modern devices with A/B partitions , you might need: fastboot flash recovery_ab recovery.img Use code with caution. Copied to clipboard Note: Some newer devices require flashing vendor_boot instead of . Always check the specific installation guide for your device 4. Reboot into Recovery
Once the flash is finished, reboot directly into recovery to prevent the stock OS from overwriting it: fastboot reboot recovery Use code with caution. Copied to clipboard Alternatively, hold the Volume Up + Power buttons while the device reboots. Next Steps in crDroid Recovery Once inside the recovery: How to Flash crDroid ROM [Android 14] on Poco F5
Here is the proper text guide for installing crDroid using the recovery.img method.
Part 1: What is crDroid Recovery?
Before diving into the installation process, it is crucial to understand what crDroid Recovery is and how it differs from other recoveries.
crDroid Recovery is a custom recovery image based on LineageOS Recovery. It is maintained by the crDroid development team and is optimized to handle the specific installation scripts, partitioning schemes, and signature verification methods used by crDroid ROMs.
4. Installation Procedure
Q3: My device doesn’t have a separate recovery partition. What do I do?
A: On devices with Virtual A/B or recovery-ramdisk (Pixel 6/7/8 series), you flash crDroid recovery to the boot partition temporarily. Check XDA forums for your device.
How to Use crDroid Recovery to Install the crDroid ROM
Now that you have completed the "crdroid recoveryimg install" process, you need to actually install the operating system.
How to Update crDroid Using Its Recovery
Once you are on crDroid, updating is simpler than the initial install.
- Download the new crDroid ROM ZIP to your PC.
- Reboot to crDroid recovery (Settings -> System -> Updater -> Three dots -> Reboot to recovery, or power + volume down).
- Select Apply update -> Apply from ADB.
- Sideload the new ZIP. You do not need to factory reset for an update.
- Reboot. Your data remains intact.
7.1 Updating crDroid via Recovery
When a new crDroid version releases, you do not need to re-flash recovery. Simply:
- Reboot to crDroid Recovery.
- Use
Apply from ADB to sideload the new ROM ZIP.
- Do not wipe data if you are just updating.
2. Prerequisites
Before installation, the following conditions must be met:
| Requirement | Specification |
|-------------|----------------|
| Device | Android device with unlockable bootloader (e.g., Google Pixel, OnePlus, Xiaomi) |
| Host PC | Windows/Linux/macOS with USB debugging enabled on device |
| Software | Platform Tools (ADB & Fastboot) version 33.0.3 or later |
| Recovery Image | Official crdroid_recovery.img for exact device model |
| Backup | Complete user data backup (unlocking bootloader wipes data) | Flash custom ROMs : With CRDroid recovery, you
Prophets In Quran & Their Ancestry
A Journey Through Revelation - Unveiling The Prophetic Legacy
Read More
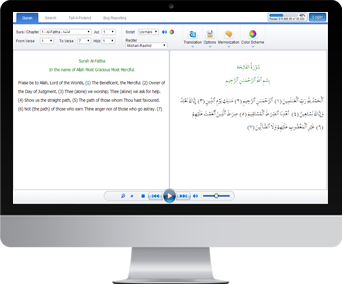
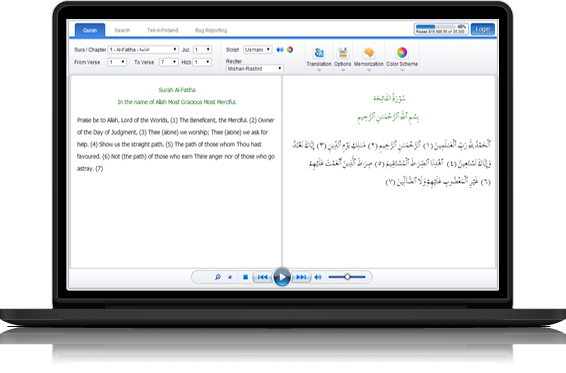
Quran Explorer
Our well known Web client for Recitation & Translation. Its user friendly & completely installation free
Visit Now

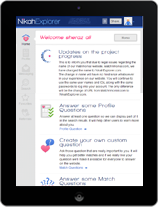

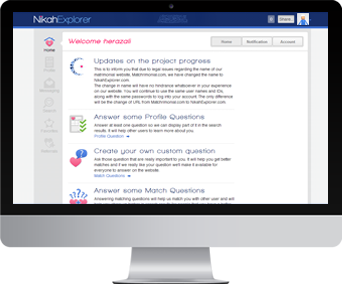
Nikah Explorer
NikahExplorer.com is the #1 choice for Single Muslims across the globe to find their ideal life partner through a unique Shariah compliant match making website
Register For Free
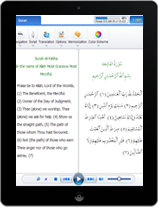

New Quran Explorer Web App
Compatible with your new Tablet & Smartphone along with advance log in & tracking feature
Visit Now
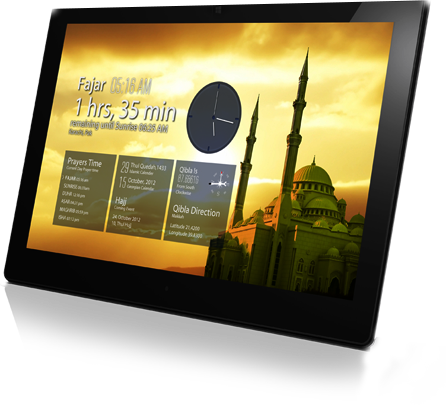
Salah Explorer
- Auto detect local Salah times
- Salah time view in 5 or 30 days interface
- Location based Qibla direction
- Both Islamic and Georgian calendar
- Salah timings for Hanfi & Shafi
- Custom location settings
- Automatically updates when connected
Download
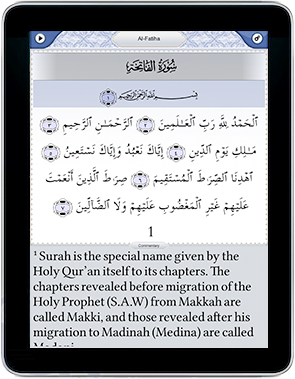
iPhone / iPad App
Simple to use with high quality audio. Your favorite Quran reading application is now available for iPhone & iPad with lots of new features
Visit App Store
Quran Desktop
Listen to The Quran recitation & translation in Arabic, English and Urdu. This application is now available in both online & offline modes
Get Desktop App
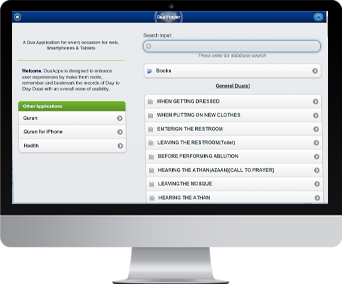
Dua App
Four popular Dua books digitized and searchable containing 1000+ Duas (Supplications) for daily use or special circumstances. Designed to be optimized for Tablets, Smart Phones, and Desktop
Visit Now

Quran Interactive
Learn to read The Holy Quran online with professional teachers. Join hundreds of people that are benefiting from our advance teaching system
Sign up now for a 2 days FREE trial evaluation
Sign UP Now
Hadith Explorer
18,000+ Hadith from Bukhari, Muslim, Malik and Dawud searchable & organized in easy to view chapters
Visit Now
Installing a crDroid recovery image requires an unlocked bootloader and a PC equipped with Android SDK platform tools. crDroid recovery is a lightweight, specialized tool designed perfectly to handle the installation and maintenance of crDroid custom ROMs.
Because installation steps can vary depending on your device's partition layout (such as dynamic partitions or A/B slots), always verify your specific model's requirements on the crDroid Devices Portal. 🛠️ Prerequisites
Backup everything: This process completely wipes your internal storage.
Unlock the bootloader: Your phone must have an unlocked bootloader to accept custom images.
Enable Developer Options: Go to Settings > About Phone and tap Build Number 7 times.
Toggle USB Debugging: Turn it on inside the newly visible Developer Options menu.
Get Platform Tools: Download the official Google Android SDK Platform Tools for your PC.
Acquire the files: Download your phone's specific recovery.img (or boot.img/vendor_boot.img if prescribed by crDroid) and the crdroid.zip OS package from the official crDroid Download Section. 💻 Step 1: Boot to Fastboot Mode
Connect your phone to your PC with a high-quality USB cable.
Open a command prompt or terminal inside your extracted platform-tools folder. Reboot your device into fastboot by typing: adb reboot bootloader Use code with caution. Copied to clipboard Confirm your PC recognizes the phone by running: fastboot devices Use code with caution. Copied to clipboard (If a random serial code pops up, you are ready to proceed) ⚡ Step 2: Flash the crDroid Recovery Image
The precise command depends heavily on your device architecture. Identify which command fits your specific phone: For standard devices with a recovery partition: fastboot flash recovery recovery.img Use code with caution. Copied to clipboard For newer devices using boot or vendor_boot for recovery:
(Refer to your device's specific guide on the crDroid device list to see which partition handles the recovery image) fastboot flash boot recovery.img Use code with caution. Copied to clipboard or fastboot flash vendor_boot recovery.img Use code with caution. Copied to clipboard 📲 Step 3: Boot into crDroid Recovery
Do not allow your phone to boot back into its original operating system after flashing, or the stock OS will overwrite your newly installed recovery. Unplug the cable or use physical buttons.
Hold Volume Up + Power (or your device's specific physical button combo) until the phone vibrates and launches the crDroid recovery interface. 💾 Step 4: Install the crDroid ROM
Once you are successfully inside the crDroid recovery, you can officially install the operating system. How to install crDroid 11 for Redmi Note 10 Pro/Max (sweet)
How to Install crDroid Recovery: A Step-by-Step Guide If you are looking to install crDroid, one of the most popular and customizable custom ROMs in the Android community, you’ve likely noticed that many modern builds recommend using the official crDroid Recovery instead of the traditional TWRP or OrangeFox.
Installing the recovery.img correctly is the "make or break" step for a successful ROM flash. In this guide, we’ll walk through exactly how to install crDroid recovery on your device to ensure a clean, stable installation. Why Use crDroid Recovery?
While TWRP is a legend in the scene, many newer Android versions (Android 12, 13, and 14) use a virtual A/B partition system. This can make TWRP buggy or unable to decrypt data. crDroid Recovery is specifically designed to: Handle the exact partition layout of crDroid ROMs. Provide seamless OTA (Over-The-Air) updates.
Reduce the risk of "bootlooping" during the installation process. Prerequisites Before you start, make sure you have the following ready:
Unlocked Bootloader: This is mandatory. You cannot flash a recovery image on a locked device.
Platform Tools: Download the latest ADB and Fastboot tools for your PC.
USB Drivers: Ensure your PC recognizes your phone in Fastboot mode (especially important for Windows users).
The recovery.img File: Download the specific recovery file for your device model from the official crDroid website. Step 1: Prepare Your Device and PC
On your phone, go to Settings > About Phone and tap Build Number 7 times to enable Developer Options.
Go to Settings > System > Developer Options and enable USB Debugging. Connect your phone to your PC.
Open your Platform Tools folder, hold Shift + Right Click, and select Open PowerShell window here (or Command Prompt). Step 2: Boot into Fastboot Mode In your terminal, type: adb reboot bootloader Use code with caution.
Your phone will reboot to a screen (usually with a robot or text) that says FASTBOOT. To verify the connection, type: fastboot devices Use code with caution. If you see a serial number, you’re ready to proceed. Step 3: Flash the crDroid Recovery Image
The command you use depends on whether your device has a dedicated recovery partition or uses the boot partition. Option A: For devices with a Recovery Partition Most older or specific "A-only" devices use this: fastboot flash recovery recovery.img Use code with caution.
(Note: Replace "recovery.img" with the actual name of the file you downloaded, or rename the file to recovery.img for simplicity.)
Option B: For A/B Partition devices (Common in newer phones)
Newer devices often don't have a "recovery" partition; the recovery lives inside the boot image. In this case, use: fastboot flash boot recovery.img Use code with caution. Step 4: Reboot into crDroid Recovery
Important: Do not reboot back into System (Android) yet, or the OS might overwrite the recovery you just flashed.
Use the Volume Buttons on your phone to navigate the Fastboot menu to "Recovery Mode" and press Power to select it. Alternatively, run: fastboot reboot recovery Use code with caution.
You should now see the purple/dark crDroid Recovery interface. Step 5: What to do next?
Now that you are in crDroid Recovery, you are ready to flash the ROM:
Factory Reset: Go to Factory Reset > Format data/factory reset. (This will wipe your phone!) Apply Update: Go to Apply update > Apply from ADB. Sideload ROM: From your PC, type: adb sideload crdroid_rom_name.zip Use code with caution. Troubleshooting Tips
"Command not found": If you are using PowerShell, try adding ./ before the commands (e.g., ./fastboot flash recovery recovery.img).
Waiting for Device: This usually means your drivers aren't installed correctly. Check Windows Device Manager to see if your phone is listed as "Android Bootloader Interface."
Verification Failed: Ensure you downloaded the recovery specifically for your device's codename (e.g., "alioth" for Poco F3).
By using the official crDroid recovery.img, you ensure that the internal scripts for your specific ROM build run exactly as the developers intended. Happy flashing! To help you get this right, let me know: What device model (and codename) are you using?
Which version of crDroid (e.g., v10, v11) are you trying to install? Are you currently on a custom ROM or the stock firmware?
I can provide the specific commands or download links tailored to your phone!
What is CRDroid?
CRDroid is a custom Android ROM that offers a clean, simple, and feature-rich experience. It's based on the Android Open Source Project (AOSP) and is designed to be compatible with various devices.
Why Install CRDroid Recovery.img?
Installing CRDroid recovery.img allows you to:
- Flash custom ROMs: With CRDroid recovery, you can easily flash custom ROMs, including CRDroid itself.
- Backup and restore: Create backups of your device and restore them when needed.
- Wipe data: Perform a full wipe of your device's data, cache, and dalvik cache.
- Fix bootloops: If your device gets stuck in a bootloop, CRDroid recovery can help you fix it.
Requirements
- A compatible Android device
- A computer with ADB and Fastboot installed
- A USB cable
- CRDroid recovery.img file (download from the official CRDroid website or forum)
Step-by-Step Installation Guide
- Enable Developer Options: Go to your device's Settings > About phone > Build number and tap on it 7 times to enable Developer Options.
- Enable OEM Unlocking: Go to Settings > Developer Options > OEM Unlocking and toggle it on.
- Boot into Fastboot: Reboot your device into Fastboot mode by holding the Volume Down and Power buttons simultaneously.
- Connect to Computer: Connect your device to your computer using a USB cable.
- Verify Fastboot Connection: Open a command prompt or terminal on your computer and type
fastboot devices to verify that your device is detected.
- Flash CRDroid Recovery.img: Type the following command to flash the CRDroid recovery.img:
fastboot flash recovery recovery.img
Replace recovery.img with the actual file name of the CRDroid recovery.img you downloaded.
- Reboot into Recovery: Once the flashing process completes, reboot your device into recovery mode by holding the Volume Up and Power buttons simultaneously.
- Navigate Recovery Menu: Use the Volume buttons to navigate the recovery menu and the Power button to select options.
Tips and Precautions
- Backup your data: Before installing CRDroid recovery, make sure to backup your important data to avoid losing it during the process.
- Use a compatible recovery.img: Ensure that you download the correct CRDroid recovery.img file for your device.
- Be cautious with fastboot commands: Double-check the commands you execute using fastboot to avoid causing damage to your device.
Installing the crDroid Recovery Image is a critical first step before flashing the crDroid ROM. This recovery replaces your phone's stock recovery environment, allowing you to "sideload" the operating system and other packages like GApps.
These video guides provide step-by-step visual walkthroughs for installing crDroid and its custom recovery on popular devices like the Poco F5 and Pixel series: How to Flash crDroid ROM [Android 14] on Poco F5
How to Install crDroid Recovery (recovery.img): A Step-by-Step Guide
If you are looking to install crDroid, one of the most popular performance-oriented custom ROMs, the first step is often setting up the dedicated crDroid Recovery. While many users are familiar with TWRP, using the official crDroid recovery image often ensures better compatibility with their specific update system and encryption handling.
This guide will walk you through the process of flashing the recovery.img to your device so you can get started with a clean crDroid installation. Prerequisites: Before You Begin
Installing a custom recovery involves modifying your device’s core partitions. Ensure you have the following ready:
Unlocked Bootloader: You cannot flash a recovery image if your bootloader is locked.
ADB & Fastboot Drivers: Installed on your PC (Windows, macOS, or Linux). USB Debugging: Enabled in your phone’s Developer Options.
The Correct Image: Download the specific recovery.img for your device model from the official crDroid website.
Backup Your Data: This process can lead to data loss. Back up everything important to the cloud or an external drive. Step 1: Prepare Your Environment
Once you have downloaded the recovery.img file, move it into the folder on your PC where your ADB and Fastboot binaries are located. For ease of use, rename the file to simply recovery.img.
Open a command prompt or terminal window in that folder. You can usually do this by holding Shift + Right Click in the folder and selecting "Open PowerShell window here" or "Open Command Prompt here". Step 2: Boot Into Fastboot Mode
Connect your device to your PC via a high-quality USB cable. In your terminal, type: adb reboot bootloader Use code with caution.
Your phone will restart into a screen (often showing a logo or "Fastboot Mode" text). To verify the connection, type: fastboot devices Use code with caution.
If you see a serial number followed by "fastboot," you are ready to proceed. Step 3: Flash the crDroid Recovery Image
The command you use depends on whether your device has a Recovery Partition or uses the Boot Partition for recovery (common in newer A/B partition devices). Option A: For devices with a dedicated recovery partition Type the following command: fastboot flash recovery recovery.img Use code with caution.
Option B: For devices without a dedicated recovery partition (A/B devices)
On newer phones, the recovery is part of the boot image. You will flash it to the boot slot: fastboot flash boot recovery.img Use code with caution. Step 4: Boot into crDroid Recovery
Once the flash is finished, do not reboot into the OS immediately, as some devices will overwrite the custom recovery with the stock one upon a normal reboot.
Use the volume buttons on your device to navigate the fastboot menu to "Recovery Mode" and press the Power button to select it. Alternatively, you can try: fastboot reboot recovery Use code with caution. You should now see the crDroid Recovery interface. Step 5: Finalizing (Factory Reset)
Before installing the crDroid ROM itself, the recovery will usually require a clean slate: Select Factory Reset. Select Format data/factory reset. Confirm the action.
Your device is now prepared. From here, you can select Apply Update > Apply from ADB to sideload the actual crDroid ROM zip file using the adb sideload .zip command. Troubleshooting Tips
Device Not Found: Ensure you have the correct USB drivers installed. Try a different USB port (USB 2.0 is often more stable for fastboot than 3.0).
Bootloop: If your device gets stuck on the logo, ensure you formatted the data partition correctly in Step 5.
"Waiting for device": This usually means your PC doesn't recognize the phone in Fastboot mode. Check your Device Manager for "Android Bootloader Interface" errors.
By installing the crDroid recovery image, you’ve laid the groundwork for a faster, more customizable Android experience.
Are you planning to install GApps (Google Apps) alongside crDroid, or are you going for a de-googled setup?
Installing the crDroid recovery image is the essential first step to flashing the full crDroid ROM
. This custom recovery allows you to format data and sideload the ROM package onto your device. Prerequisites Unlocked Bootloader : Your device must have an unlocked bootloader. : Ensure you have ADB and Fastboot drivers installed on your PC. : Download the recovery.img vendor_boot.img
for some newer devices) specifically for your device model from the official crDroid download page Installation Steps 1. Boot to Fastboot Mode
Connect your phone to your computer via USB. Open a terminal or command prompt and type: adb reboot bootloader Use code with caution. Copied to clipboard Alternatively, power off your device and hold Volume Down + Power until "FASTBOOT" appears. 2. Verify Connection Ensure your computer recognizes the device by typing: fastboot devices Use code with caution. Copied to clipboard
You should see your device's serial number. If not, recheck your USB drivers. 3. Flash the Recovery Image
The exact command depends on your device's partition structure. Most standard devices use: fastboot flash recovery recovery.img Use code with caution. Copied to clipboard For modern devices with A/B partitions , you might need: fastboot flash recovery_ab recovery.img Use code with caution. Copied to clipboard Note: Some newer devices require flashing vendor_boot instead of . Always check the specific installation guide for your device 4. Reboot into Recovery
Once the flash is finished, reboot directly into recovery to prevent the stock OS from overwriting it: fastboot reboot recovery Use code with caution. Copied to clipboard Alternatively, hold the Volume Up + Power buttons while the device reboots. Next Steps in crDroid Recovery Once inside the recovery: How to Flash crDroid ROM [Android 14] on Poco F5
Here is the proper text guide for installing crDroid using the recovery.img method.
Part 1: What is crDroid Recovery?
Before diving into the installation process, it is crucial to understand what crDroid Recovery is and how it differs from other recoveries.
crDroid Recovery is a custom recovery image based on LineageOS Recovery. It is maintained by the crDroid development team and is optimized to handle the specific installation scripts, partitioning schemes, and signature verification methods used by crDroid ROMs.
4. Installation Procedure
Q3: My device doesn’t have a separate recovery partition. What do I do?
A: On devices with Virtual A/B or recovery-ramdisk (Pixel 6/7/8 series), you flash crDroid recovery to the boot partition temporarily. Check XDA forums for your device.
How to Use crDroid Recovery to Install the crDroid ROM
Now that you have completed the "crdroid recoveryimg install" process, you need to actually install the operating system.
How to Update crDroid Using Its Recovery
Once you are on crDroid, updating is simpler than the initial install.
- Download the new crDroid ROM ZIP to your PC.
- Reboot to crDroid recovery (Settings -> System -> Updater -> Three dots -> Reboot to recovery, or power + volume down).
- Select Apply update -> Apply from ADB.
- Sideload the new ZIP. You do not need to factory reset for an update.
- Reboot. Your data remains intact.
7.1 Updating crDroid via Recovery
When a new crDroid version releases, you do not need to re-flash recovery. Simply:
- Reboot to crDroid Recovery.
- Use
Apply from ADB to sideload the new ROM ZIP.
- Do not wipe data if you are just updating.
2. Prerequisites
Before installation, the following conditions must be met:
| Requirement | Specification |
|-------------|----------------|
| Device | Android device with unlockable bootloader (e.g., Google Pixel, OnePlus, Xiaomi) |
| Host PC | Windows/Linux/macOS with USB debugging enabled on device |
| Software | Platform Tools (ADB & Fastboot) version 33.0.3 or later |
| Recovery Image | Official crdroid_recovery.img for exact device model |
| Backup | Complete user data backup (unlocking bootloader wipes data) |