• 문의하기(0)
한국어
English
繁體中文
简体中文
日本語
  • 로그인

Jcb Key Code Install _hot_ Site

  • 제품

    Jcb Key Code Install _hot_ Site

    Installing or setting up a keycode ignition on a JCB machine is primarily an anti-theft measure used across their excavator range (3T–28T) to protect assets and reduce insurance premiums [4]. How to Use Keycode Ignition

    For machines already fitted with the system, follow these steps to start the engine:

    Initial Position: Ensure the left armrest is up, enter the machine, and fasten your seatbelt [1, 9].

    Ignition Stage 1: Insert the key and turn it to Position 1. The machine will typically buzz and the display will prompt for a code [1, 2]. Enter Code: Press the MD button on the right-hand keypad [1]. Input your four-digit unique hire code [1, 2]. Press Enter (the "tick" button) to confirm [1, 6].

    Warming (Preheat): Turn the key to Position 2 and hold for 5–10 seconds to warm and prime the engine [1, 2].

    Start Engine: Turn the key fully to the right to start the machine.

    Activate Hydraulics: Once the engine is running, lower the left armrest and press the two-go button (typically located below the keypad) to unlock the hydraulic controls [1, 9]. Installation & Configuration

    Dealer Installation: Standard JCB machines may not come with a keypad enabled. For newer models (like the 2023 Teleskid), owners often have to request the dealer to enable or install the immobiliser through JCB ServiceMaster, a proprietary diagnostic tool [11, 23].

    Programming: If you need to change a code or deactivate the system, it must be done via a dealer representative using a Service Advisor or the ServiceMaster software. There is no manual "bypass" for this system by design to prevent theft [23].

    Components: Keypad ignition units are often part of a broader security package like JCB PlantGuard, which includes window etching and battery isolators [14]. Troubleshooting

    Intermittent Starting: If the machine fails to start after entering the code, check the parking brake and FNR (Forward-Neutral-Reverse) switch; both must be in neutral/active positions for the interlock to release [6, 13].

    Loss of Code/Key: If the key is lost or the code is unknown, a JCB Distributor must be contacted to recode the machine [23, 24].

    I’m not sure what you mean by “complete piece.” Possible intentions and completions:

    1. If you want the full search phrase for finding installation instructions:
    • "jcb key code install procedure"
    • "jcb key code install guide"
    • "jcb key code install manual download"
    1. If you want a concise instructional phrase/title:
    • "JCB key code installation guide"
    1. If you meant a short command or filename:
    • "jcb_key_code_install.sh"

    If you want a specific completion (e.g., search query, file name, step‑by‑step install instructions, or a written paragraph), tell me which and I’ll produce it. jcb key code install

    (You may also mean the brand JCB — if so, say whether this is about excavator key codes, ECU immobilizer programming, or software.)

    How to Use and Install a JCB Key Code: A Step-by-Step Guide Whether you are a new operator or hiring equipment, understanding the JCB key code ignition system is essential for security and operation. Many modern JCB machines, like the 3T Excavator, use a dual-layer start process: a physical key combined with a unique four-digit electronic code.

    Here is how to properly "install" or enter your code to get the machine running. 1. Power On the System

    Insert your JCB ignition key into the switch. Turn it to Position 1. You will hear the machine begin to buzz, and the digital display will prompt you for a four-digit unique code. 2. Enter the Code

    Locate the keypad, usually positioned on the right-hand side of the cabin. Press the MD button to activate the entry mode.

    Input your four-digit code (this is typically provided by your hire company or fleet manager). Press Enter on the keypad to confirm. 3. Prime and Start Once the code is accepted, go back to the physical key:

    Turn the key to Position 2 and hold it there for 5–10 seconds. This allows the engine to warm and prime.

    Turn the key all the way to the Start position until the engine fires up. 4. Safety Check

    After starting, it is standard practice to test the hydraulics by operating each function briefly. This ensures the system is fully pressurized and ready for work.

    The JCB Key Code Immobilizer is a security feature standard on most modern JCB equipment, designed to prevent unauthorized operation. Installing or setting up a new PIN code requires a six-digit master code (often the last six digits of the chassis number, sometimes backwards). How to Install a New PIN Code

    To program a new operator code (up to 14 different codes can be stored), follow these steps using the machine's keypad:

    Prepare Codes: Ensure you have your six-digit master code and the new four-digit PIN ready. Ignition On: Insert the key and turn it to Position 1.

    Enter Master Code: Type the six-digit master code on the keypad and press ENT. The LED should flash three times. Installing or setting up a keycode ignition on

    Register New PIN: Within 5 seconds, press the MD button, then enter your new four-digit PIN and press ENT. The LED will flash four times to confirm.

    Finalize: Turn the ignition off for at least five seconds. The new code is now recorded. Starting the Machine with a Key Code

    Once a code is installed, follow this sequence to start the engine:

    Safety Check: Ensure the left armrest is up and you are wearing your seatbelt.

    Power On: Turn the key to Position 1. You will hear a buzzing sound prompting for a code.

    Input Code: Press MD, enter your four-digit unique code, and press ENT.

    Prime Engine: Turn the key to Position 2 and hold for 10 seconds to prime the engine. Start: Turn the key fully to the right to start the engine.

    Unlock Hydraulics: Lower the armrest and press the unlock button (often located below the keypad) to engage the hydraulics. Advanced Management & Troubleshooting

    To enter or "install" a key code on a JCB machine with an immobilizer, you typically follow a specific sequence using the machine's keypad after turning the ignition to the first position. Standard Key Code Entry Procedure

    The exact buttons may vary slightly by model (e.g., 3T vs. 9T excavator), but the general process is:

    Preparation: Enter the cab and ensure the left-hand armrest is in the up position. Fasten your seatbelt, as some models will not allow the code to be accepted without it.

    Ignition: Insert the key and turn it to Position 1. You should hear a buzzing sound and see a prompt on the display for a code. Entry:

    Press the MD button (or the button with a "tick" icon) on the right-hand keypad. Enter your 4-digit unique code. Press the Enter button or the tick key to confirm. If you want the full search phrase for

    Startup: Once the code is accepted, turn the key to Position 2 to warm the engine (approx. 10 seconds), then fully turn it to start. Initial Setup or "Installation"

    If you are looking to install or enable the immobilizer system for the first time on a machine where it is currently disabled:

    Dealer Activation: Most JCB immobilizer systems are enabled by a dealer during initial machine installation.

    ServiceMaster Software: For technicians, advanced changes—such as activating, deactivating, or resetting an immobilizer after an ECU replacement—require JCB ServiceMaster diagnostic software.

    Changing Codes: If you need to change an existing code, this often requires access to the High Security Unlock section within ServiceMaster to generate a challenge/response value. JCB JS220LC Code Unlock Not Working After ECU Install

    The proper article would be: "JCB Key Code Install" (using the official brand name JCB in capitals, as it stands for J. C. Bamford — though the company itself is typically referred to as JCB).

    If this is a title/heading (like a guide or software manual), you could also phrase it as:

    • "JCB Key Code Installation" (more natural English)
    • "Installing a JCB Key Code"

    But for the exact phrase you gave, the correct form is:

    JCB Key Code Install


    Installation Using JCB ServiceMaster (Dealer/Workshop)

    Required when all keys are lost, or only one key exists.

    1. Connect JCB EST (Electronic Service Tool) to the machine’s diagnostic port (usually 9-pin or CAN).
    2. Power on machine (battery only, ignition OFF).
    3. Navigate: Security System → Key Programming → Add Key.
    4. Follow on-screen prompts to enter machine serial number and security PIN (obtained from JCB with proof of ownership).
    5. Insert new key, turn to ON, and click Program.
    6. Verify success by cycling ignition and checking immobilizer LED behavior.

    Step-by-Step Guide: How to Perform a JCB Key Code Install

    The exact button sequence can vary slightly between JCB models (e.g., 3CX, 4CX, 530-70 Telehandler, 220X Excavator). However, the most common method for machines with a digital display (circa 2010–present) is as follows.

    Why Would You Need a JCB Key Code Install?

    Several real-world scenarios make a JCB key code installation necessary:

    1. Lost Keys: The most common reason. If you lose all master keys, you cannot start the machine. A new key must be ordered from JCB using the machine’s serial number, and then the code must be installed.
    2. Adding Spare Keys: Fleet managers often want multiple operators to have access. Each new key has a unique transponder code that needs to be added to the system.
    3. ECU Replacement: If the main computer (ECU) of the JCB machine fails and is replaced, the new ECU has no memory of your existing keys. All keys must have their codes reinstalled.
    4. Battery Failure or Memory Corruption: In rare cases, a total power loss or a voltage spike can corrupt the key code memory, requiring a fresh install of all codes.
    5. Buying Used Equipment: When purchasing a second-hand JCB machine, it is wise to perform a key code reset and install only the keys you possess to prevent previous owners from accessing the machine.

    Pro Tips for a Smooth Installation

    1. Keep Your Codes Safe: Once you successfully perform a JCB key code install, write down the code and the key’s ID number in a secure logbook. Do not store it in the machine’s glove box.
    2. Battery Voltage Matters: Low battery voltage (below 11.5V) often causes programming failures. Connect a battery charger before starting.
    3. Timing is Everything: When turning the key on/off, use a steady rhythm. Rushing or pausing too long will cancel programming mode.
    4. Don’t Interrupt: Never turn off the machine or disconnect the battery while the screen says “Programming.” This can corrupt the ECU memory, requiring a dealer reflash.
    에지 컴퓨팅 플랫폼
    • 산업용 PC, 마더보드 & SBC
    • 임베디드 컴퓨터 & IoT 게이트웨이
    • 에지 AI 플랫폼
    • AI 스마트 카메라
    • 로봇 컨트롤러
    • 산업용 SSD
    산업용 디스플레이 시스템 및 패널 PC
    • 산업용 터치 모니터
    • 오픈프레임 패널 PC
    • 올인원 패널 PC
    • 러기드 패널 PC
    • 디지털 사이니지 플레이어/컴팩트 박스 PC
    네트워킹 & 서버
    • AI GPU 서버
    • 산업용, 통신 서버
    자동화 & 제어
    • 머신 비전
    • 모션 제어 & I/O
    • EtherCAT 모션 컨트롤 솔루션
    • HMI 패널 PC
    • 데이터 수집
    • GPIB & 디지타이저
    • PXI 플랫폼 & 모듈
    • 자율이동로봇
    • 산업용 IoT 게이트웨이
    설계 & 제조 서비스
    • DMS+ (ODM/OEM 서비스)
    헬스케어 컴퓨팅 & 모니터
    • 메디컬 패널 PC
    • 메디컬 모니터
    • 메디컬 박스 PC
    게임 플랫폼 & 모니터
    • 게이밍 전용 솔루션
    • 일반 솔루션
    • 게이밍 모니터
    • 첨단 게이밍 아키텍처
    소프트웨어
    • EdgeGO
  • 솔루션
    엣지 AI 게임 헬스케어 철도 로보틱스 반도체 솔루션 스마트 팩토리

    엣지 AI

    엣지 AI

    차세대 분산형 지능을 선도하는 에이디링크의 엣지 AI 솔루션은 저전력 추론부터 고부하 대형 모델 추론에 이르기까지, 모든 엣지 계층을 아우르는 포괄적인 포트폴리오를 제공합니다. 모든 시스템은 AI 통합 시스템으로 설계되어, GPU 및 가속기 지원 I/O를 통해 진정한 플러그 앤 플레이 방식의 배포를 지원합니다. 또한 생성형 AI 대응 설계를 바탕으로 비전 AI, 예측 분석, 효율적인 온디바이스 LLM 추론에 최적화된 성능을 제공합니다.

    자세한 내용

    게임

    게임

    에이디링크는 글로벌 게이밍 머신 생산업체에 하드웨어, 소프트웨어, 디스플레이를 제공하고 있습니다. 컴퓨터 전문 지식과 엣지 소프트웨어 스택의 결합, 그리고 게이밍 산업의 요구사항과 규제사항에 대한 깊은 이해를 바탕으로, 우리는 고객이 세계 최고의 게임을 제작하는데 집중할 수 있도록 지원합니다.

    자세한 내용

    헬스케어

    헬스케어

    의료장비의 시각화 및 의료 인증을 받은 솔루션에 전념하고 있는 에이디링크 테크놀로지는 스마트 헬스케어의 디지털화 요구를 충족합니다. PENTA의 의료 분야 설계와 제조 능력을 기반으로 하는 에이디링크 테크놀로지의 헬스케어 솔루션은, 다양한 의료 환경 속에서 디지털 어플리케이션의 적용이 가능하도록 합니다.

    자세한 내용

    철도

    철도

    우리의 러기드한 CompactPCI,컴퓨터 온 모듈, 산업용 등급의 시스템과 패널 컴퓨터 제품 포트폴리오는 온보드 ATO/DMI와 철로 CTC/RBC/TSR 레일웨이 솔루션에서 사용되고 있습니다. 에이디링크의 우수한 디자인 및 생산력은 전세계 유수한 철도 신호 공급업체에서 채택되고 있습니다.

    자세한 내용

    로보틱스

    로보틱스

    AMR(자율이동로봇)은 사람 없이 혹은 최소의 사람의 감독만으로 임무를 수행할 수 있습니다. 학교, 병원, 쇼핑몰, 공장과 같은 시설에서는 스웜 AMR 을 적용하여 운영 효율성과 삶의 질을 향상시킬 수 있습니다.

    자세한 내용

    반도체 솔루션

    반도체 솔루션

    모든 것은 기본적으로 칩에 의해 구동되며, 다양한 애플리케이션의 요구에 맞게, 품질과 효율성과 생산성에 이르기까지 모든 것을 보장하는 완벽한 웨이퍼 제조 프로세스가 필요합니다.

    자세한 내용

    스마트 팩토리

    스마트 팩토리

    엣지 컴퓨팅을 기반으로 하는 에이디링크 스마트 제조 솔루션은 의사 결정을 위해 더 빠른 데이터를 보장하고, 반도체 및 전자 제조를 위한 보다 탄력적이고 안전한 생산 환경을 조성합니다.

    자세한 내용
  • 전략 파트너
    AMD Ampere Arm Intel MediaTek NVIDIA NXP Qualcomm

    AMD 기반 솔루션

    AMD 기반 솔루션

    에지 솔루션을 지원하는 선도 기업 ADLINK와 함께 귀하의 에지 컴퓨팅을 강화하십시오. x86 코어 아키텍처를 기반으로 하는 광범위한 에지, 네트워크 및 에지 시스템에서 AMD의 고성능, 보안 통합 및 전력 효율성 이점을 활용해 보십시오. EPYC™ 9004/9005 시리즈 CPU 및 Radeon™ RX가 탑재된 ADLINK의 AMD EPYC™ 서버 CPU 및 Ryzen™ Embedded 시리즈 활용을 통해 산업, 의료, 자동화 및 게이밍 애플리케이션에 최적화된 우수한 프로세싱 및 그래픽 성능을 경험해 보십시오.

    자세한 내용

    Ampere 기반 솔루션

    Ampere-based Solutions by ADLINK

    Ampere Altra 기반의 COM-HPC 모듈, 개발 플랫폼 및 개발 키트를 포함한 에이디링크의 종합적인 제품군으로 엣지 컴퓨팅의 미래를 경험하세요. 산업 자동화, 자율 주행, 운송, 헬스케어, 영상 감시, 에너지 관리 등 다양한 애플리케이션에 대해 탁월한 성능, 에너지 효율성, 최적의 TCO를 실현합니다.

    자세한 내용

    Arm 기반 솔루션

    Arm-based Solutions by ADLINK

    Arm 아키텍처를 기반으로, 에이디링크는 Ampere, NXP, MediaTek, Qualcomm, Rockchip과 협업하여 스마트 제조, 자율 주행, 로보틱스, AMR, 드론, 운송, 물류, 리테일, 인포테인먼트, 헬스케어, 보안 등 다양한 산업에 모듈 컴퓨팅 및 부가가치 솔루션을 제공합니다.

    플러그 앤 플레이 도구, 개발 키트 및 통합 시스템을 통해 에이디링크와 Arm은 개발자들이 혁신을 가속화하고 실현할 수 있도록 지원합니다.

    자세한 내용

    Intel 기반 솔루션

    Intel based Solutions by ADLINK

    ADLINK는 Intel® Partner Alliance의 Prestige Partner입니다. 모듈형 컴퓨팅부터 시스템 수준의 유스케이스에 이르기까지, ADLINK는 Intel과 긴밀히 협력하여 확장 가능하고 상호운용성이 뛰어난 솔루션을 제공함으로써 엔드투엔드 분석 기능을 갖춘 지능형 디바이스의 구축을 가속화합니다.

    ADLINK는 Intel® AI Edge Systems를 활용하여 엣지 환경에서 확장 가능하고 고성능의 AI를 제공합니다. 검증되고 벤치마크된 엣지 컴퓨팅 플랫폼을 기반으로 구축된 이 솔루션은 GPU 및 NPU 가속과 엔터프라이즈급 관리 기능을 통합하여 실제 환경의 AI 워크로드를 최적화합니다. 또한 장기 라이프사이클 지원, 산업 등급의 높은 신뢰성, 그리고 업계 최고 수준의 총소유비용(TCO)을 바탕으로 ADLINK와 Intel은 다양한 엣지 환경에서 AI를 더욱 빠르게 시장에 도입하고 원활하게 배포할 수 있도록 지원합니다.

    자세한 내용

    MediaTek 기반 솔루션

    MediaTek-based Solutions by ADLINK

    에이디링크 테크놀로지와 MediaTek은 전략적 파트너로서 엣지 컴퓨팅 및 엣지 AI 애플리케이션을 위한 혁신적이고 강력한 솔루션을 제공합니다. MediaTek의 고효율 Genio 플랫폼 SoC와 에이디링크의 임베디드 및 러기드 설계 전문성을 결합하여 스마트 홈, 휴먼-머신 인터페이스, 멀티미디어, 산업용 IoT, 로보틱스 등 다양한 IoT 활용 사례를 위한 고성능, 에너지 효율적이며 신뢰성 높은 모듈 및 플랫폼을 제공합니다.

    자세한 내용

    NVIDIA 기반 솔루션

    NVIDIA-based Solutions

    산업별 요구사항을 충족하기 위해 에이디링크는 NVIDIA Jetson 모듈, NVIDIA IGX 플랫폼, RTX 임베디드 GPU를 기반으로 엣지 AI 플랫폼, AI 스마트 카메라, 의료 플랫폼, AI GPU 가속기 등을 효율적으로 개발합니다. 스마트 제조, 자율 주행, AMR, 로보틱스, 운송, 헬스케어, 물류, 리테일, 인포테인먼트, AI 개발, 전문가용 그래픽, 게임 등 다양한 산업에 적합합니다.

    자세한 내용

    NXP 기반 솔루션

    NXP-based Solutions by ADLINK

    에이디링크는 NXP의 i.MX 8 및 i.MX 9 시리즈 기술을 활용하여 의료, 테스트 및 측정, 자동화, 스마트 시티 고객이 총소유비용(TCO)을 절감할 수 있도록 엣지 연결 솔루션을 제공합니다. NXP 기술과 에이디링크의 엣지 컴퓨팅 R&D 경험이 결합되어 핵심 애플리케이션에 대한 유연하고 역동적인 솔루션을 구현합니다.

    자세한 내용

    Qualcomm 기반 솔루션

    Qualcomm-based Solutions by ADLINK

    Qualcomm Technologies는 로보틱스 및 드론 분야의 선도적인 솔루션 포트폴리오를 통해 자율 배송, 미션 크리티컬 애플리케이션, 상업 및 기업용 드론 등 차세대 활용 사례를 이끌고 있습니다.

    그 중 Qualcomm QRB5165 솔루션은 5G 연결, 온디바이스 AI 및 머신 러닝, 고성능 컴퓨팅, 지능형 센싱 기능을 갖춘 소비자, 기업 및 산업용 로봇 개발을 지원합니다. 에이디링크는 QRB5165를 채택하여 로보틱스 및 지능형 시스템에서 5G 확산을 가속화합니다.

    자세한 내용
    EdgeOpen Voices

    EdgeOpen™ Voices

    실제 사례와 인사이트로 엣지 AI를 이끄는 전문가들의 이야기를 확인해보세요.

    지금 확인하기
  • 고객지원

    고객지원

    파트너 센터eRMA 서비스ADLINK DDS 지원

    다운로드 센터

    소프트웨어 & 드라이버ADLINK DDS 다운로드브로셔Content Hub에이디링크 GitHub

    연락처

    영업 문의기술 문의구매처
    jcb key code install

    제품 가격 및 정보, 기술 지원 등을 필요하시면 언제든지 연락 바랍니다.

    자세한 내용
  • 회사 소개

    가치

    품질 관리 정책얼라이언스 & 컨소시엄에이디링크의 지속 가능성환경 보호 정책Capabilites

    회사 정보

    회사 정보전 세계 사무소IR (투자정보)로고 & 브랜드 가이드라인

    제품 뉴스

    뉴스 & 이벤트블로그EdgeOpen™ PodcastEdgeOpen™ Voices
    Support

    에이디링크의 최신 뉴스와 블로그를 확인하세요.

    자세한 내용

Jcb Key Code Install _hot_ Site

한국어
English
繁體中文
简体中文
日本語
  • jcb key code install

Installing or setting up a keycode ignition on a JCB machine is primarily an anti-theft measure used across their excavator range (3T–28T) to protect assets and reduce insurance premiums [4]. How to Use Keycode Ignition

For machines already fitted with the system, follow these steps to start the engine:

Initial Position: Ensure the left armrest is up, enter the machine, and fasten your seatbelt [1, 9].

Ignition Stage 1: Insert the key and turn it to Position 1. The machine will typically buzz and the display will prompt for a code [1, 2]. Enter Code: Press the MD button on the right-hand keypad [1]. Input your four-digit unique hire code [1, 2]. Press Enter (the "tick" button) to confirm [1, 6].

Warming (Preheat): Turn the key to Position 2 and hold for 5–10 seconds to warm and prime the engine [1, 2].

Start Engine: Turn the key fully to the right to start the machine.

Activate Hydraulics: Once the engine is running, lower the left armrest and press the two-go button (typically located below the keypad) to unlock the hydraulic controls [1, 9]. Installation & Configuration

Dealer Installation: Standard JCB machines may not come with a keypad enabled. For newer models (like the 2023 Teleskid), owners often have to request the dealer to enable or install the immobiliser through JCB ServiceMaster, a proprietary diagnostic tool [11, 23].

Programming: If you need to change a code or deactivate the system, it must be done via a dealer representative using a Service Advisor or the ServiceMaster software. There is no manual "bypass" for this system by design to prevent theft [23].

Components: Keypad ignition units are often part of a broader security package like JCB PlantGuard, which includes window etching and battery isolators [14]. Troubleshooting

Intermittent Starting: If the machine fails to start after entering the code, check the parking brake and FNR (Forward-Neutral-Reverse) switch; both must be in neutral/active positions for the interlock to release [6, 13].

Loss of Code/Key: If the key is lost or the code is unknown, a JCB Distributor must be contacted to recode the machine [23, 24].

I’m not sure what you mean by “complete piece.” Possible intentions and completions:

  1. If you want the full search phrase for finding installation instructions:
  • "jcb key code install procedure"
  • "jcb key code install guide"
  • "jcb key code install manual download"
  1. If you want a concise instructional phrase/title:
  • "JCB key code installation guide"
  1. If you meant a short command or filename:
  • "jcb_key_code_install.sh"

If you want a specific completion (e.g., search query, file name, step‑by‑step install instructions, or a written paragraph), tell me which and I’ll produce it.

(You may also mean the brand JCB — if so, say whether this is about excavator key codes, ECU immobilizer programming, or software.)

How to Use and Install a JCB Key Code: A Step-by-Step Guide Whether you are a new operator or hiring equipment, understanding the JCB key code ignition system is essential for security and operation. Many modern JCB machines, like the 3T Excavator, use a dual-layer start process: a physical key combined with a unique four-digit electronic code.

Here is how to properly "install" or enter your code to get the machine running. 1. Power On the System

Insert your JCB ignition key into the switch. Turn it to Position 1. You will hear the machine begin to buzz, and the digital display will prompt you for a four-digit unique code. 2. Enter the Code

Locate the keypad, usually positioned on the right-hand side of the cabin. Press the MD button to activate the entry mode.

Input your four-digit code (this is typically provided by your hire company or fleet manager). Press Enter on the keypad to confirm. 3. Prime and Start Once the code is accepted, go back to the physical key:

Turn the key to Position 2 and hold it there for 5–10 seconds. This allows the engine to warm and prime.

Turn the key all the way to the Start position until the engine fires up. 4. Safety Check

After starting, it is standard practice to test the hydraulics by operating each function briefly. This ensures the system is fully pressurized and ready for work.

The JCB Key Code Immobilizer is a security feature standard on most modern JCB equipment, designed to prevent unauthorized operation. Installing or setting up a new PIN code requires a six-digit master code (often the last six digits of the chassis number, sometimes backwards). How to Install a New PIN Code

To program a new operator code (up to 14 different codes can be stored), follow these steps using the machine's keypad:

Prepare Codes: Ensure you have your six-digit master code and the new four-digit PIN ready. Ignition On: Insert the key and turn it to Position 1.

Enter Master Code: Type the six-digit master code on the keypad and press ENT. The LED should flash three times.

Register New PIN: Within 5 seconds, press the MD button, then enter your new four-digit PIN and press ENT. The LED will flash four times to confirm.

Finalize: Turn the ignition off for at least five seconds. The new code is now recorded. Starting the Machine with a Key Code

Once a code is installed, follow this sequence to start the engine:

Safety Check: Ensure the left armrest is up and you are wearing your seatbelt.

Power On: Turn the key to Position 1. You will hear a buzzing sound prompting for a code.

Input Code: Press MD, enter your four-digit unique code, and press ENT.

Prime Engine: Turn the key to Position 2 and hold for 10 seconds to prime the engine. Start: Turn the key fully to the right to start the engine.

Unlock Hydraulics: Lower the armrest and press the unlock button (often located below the keypad) to engage the hydraulics. Advanced Management & Troubleshooting

To enter or "install" a key code on a JCB machine with an immobilizer, you typically follow a specific sequence using the machine's keypad after turning the ignition to the first position. Standard Key Code Entry Procedure

The exact buttons may vary slightly by model (e.g., 3T vs. 9T excavator), but the general process is:

Preparation: Enter the cab and ensure the left-hand armrest is in the up position. Fasten your seatbelt, as some models will not allow the code to be accepted without it.

Ignition: Insert the key and turn it to Position 1. You should hear a buzzing sound and see a prompt on the display for a code. Entry:

Press the MD button (or the button with a "tick" icon) on the right-hand keypad. Enter your 4-digit unique code. Press the Enter button or the tick key to confirm.

Startup: Once the code is accepted, turn the key to Position 2 to warm the engine (approx. 10 seconds), then fully turn it to start. Initial Setup or "Installation"

If you are looking to install or enable the immobilizer system for the first time on a machine where it is currently disabled:

Dealer Activation: Most JCB immobilizer systems are enabled by a dealer during initial machine installation.

ServiceMaster Software: For technicians, advanced changes—such as activating, deactivating, or resetting an immobilizer after an ECU replacement—require JCB ServiceMaster diagnostic software.

Changing Codes: If you need to change an existing code, this often requires access to the High Security Unlock section within ServiceMaster to generate a challenge/response value. JCB JS220LC Code Unlock Not Working After ECU Install

The proper article would be: "JCB Key Code Install" (using the official brand name JCB in capitals, as it stands for J. C. Bamford — though the company itself is typically referred to as JCB).

If this is a title/heading (like a guide or software manual), you could also phrase it as:

  • "JCB Key Code Installation" (more natural English)
  • "Installing a JCB Key Code"

But for the exact phrase you gave, the correct form is:

JCB Key Code Install


Installation Using JCB ServiceMaster (Dealer/Workshop)

Required when all keys are lost, or only one key exists.

  1. Connect JCB EST (Electronic Service Tool) to the machine’s diagnostic port (usually 9-pin or CAN).
  2. Power on machine (battery only, ignition OFF).
  3. Navigate: Security System → Key Programming → Add Key.
  4. Follow on-screen prompts to enter machine serial number and security PIN (obtained from JCB with proof of ownership).
  5. Insert new key, turn to ON, and click Program.
  6. Verify success by cycling ignition and checking immobilizer LED behavior.

Step-by-Step Guide: How to Perform a JCB Key Code Install

The exact button sequence can vary slightly between JCB models (e.g., 3CX, 4CX, 530-70 Telehandler, 220X Excavator). However, the most common method for machines with a digital display (circa 2010–present) is as follows.

Why Would You Need a JCB Key Code Install?

Several real-world scenarios make a JCB key code installation necessary:

  1. Lost Keys: The most common reason. If you lose all master keys, you cannot start the machine. A new key must be ordered from JCB using the machine’s serial number, and then the code must be installed.
  2. Adding Spare Keys: Fleet managers often want multiple operators to have access. Each new key has a unique transponder code that needs to be added to the system.
  3. ECU Replacement: If the main computer (ECU) of the JCB machine fails and is replaced, the new ECU has no memory of your existing keys. All keys must have their codes reinstalled.
  4. Battery Failure or Memory Corruption: In rare cases, a total power loss or a voltage spike can corrupt the key code memory, requiring a fresh install of all codes.
  5. Buying Used Equipment: When purchasing a second-hand JCB machine, it is wise to perform a key code reset and install only the keys you possess to prevent previous owners from accessing the machine.

Pro Tips for a Smooth Installation

  1. Keep Your Codes Safe: Once you successfully perform a JCB key code install, write down the code and the key’s ID number in a secure logbook. Do not store it in the machine’s glove box.
  2. Battery Voltage Matters: Low battery voltage (below 11.5V) often causes programming failures. Connect a battery charger before starting.
  3. Timing is Everything: When turning the key on/off, use a steady rhythm. Rushing or pausing too long will cancel programming mode.
  4. Don’t Interrupt: Never turn off the machine or disconnect the battery while the screen says “Programming.” This can corrupt the ECU memory, requiring a dealer reflash.
한국어
English
繁體中文
简体中文
日本語
  • 로그인

Jcb Key Code Install _hot_ Site

  • Home
  • 제품
  • 모션 컨트롤
  • jcb key code install
  • jcb key code install
  • jcb key code install
  • jcb key code install
  • jcb key code install
  • jcb key code install
  • jcb key code install
  • jcb key code install

Jcb Key Code Install _hot_ Site

SuperCAT

소프트웨어 EtherCAT 모션 컨트롤러
견적 요청
주요 특징
  • 소프트웨어 EtherCAT 마스터와 EtherCAT 프로토콜, IO 컨트롤, 모션 컨트롤을 짧은 시간안에 통합
  • 125μs EtherCAT 컨트롤 사이클, 하나의 PC로 최대 128축 모션 제어 지원
  • 실시간 환경에서 빠르고 안정적인 애플리케이션 실행
  • MCP2와 애플리케이션을 동시에 실행하여 m/c UPH 미세 조정
  • SuperCAT RTOS에서 사용자 작업 프로그래밍 실행
More
    jcb key code install
  • 소개
  • 시스템 요구사항
  • NIC 지원
  • 주문 정보
jcb key code install

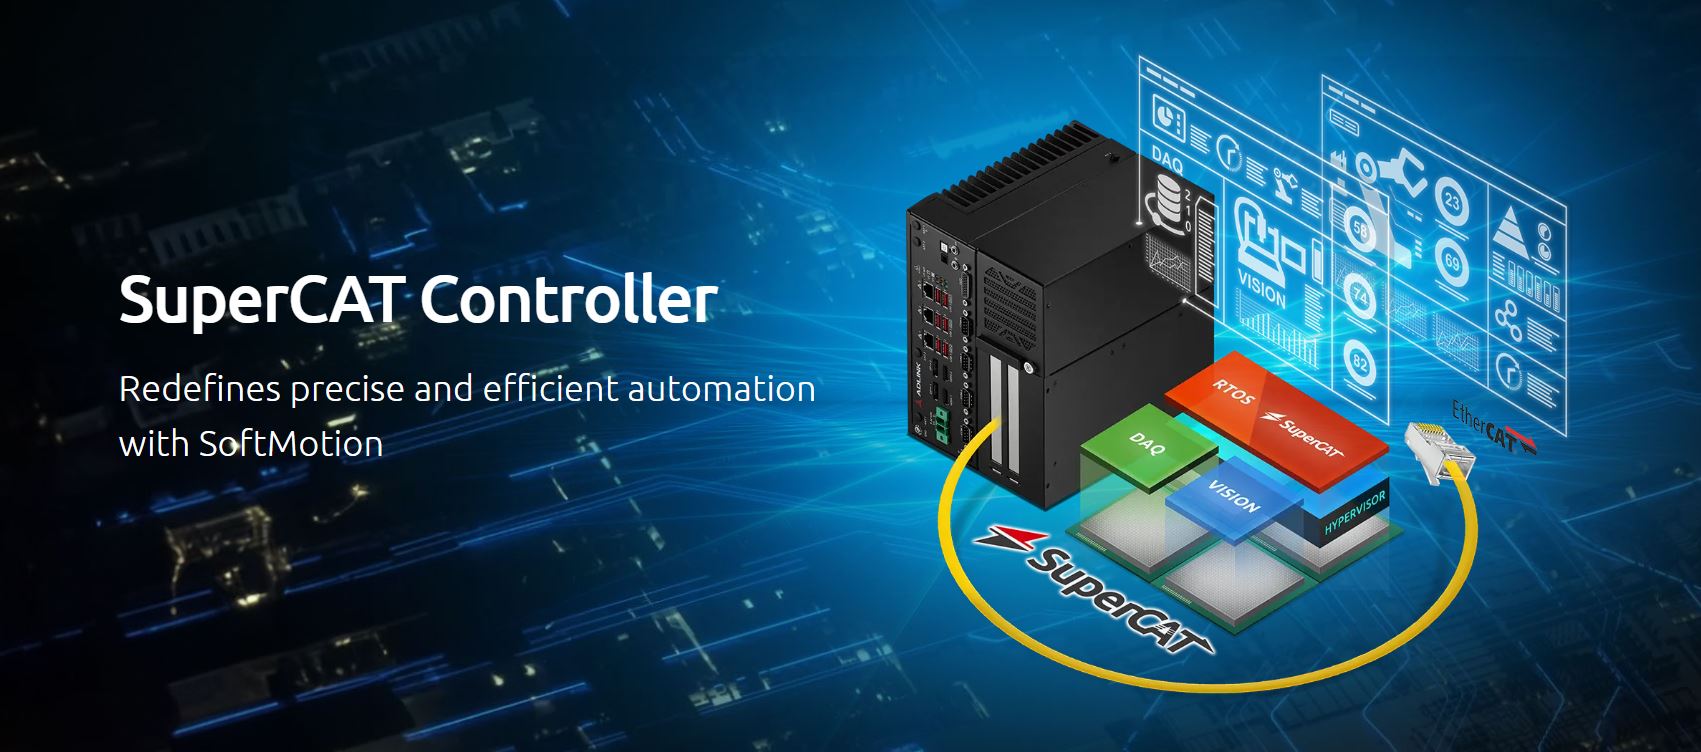
에이디링크 SuperCAT은 최대 128개의 동기화된 축과 10,000개 이상의 포인트를 동시에 지원할 수 있는 소프트웨어 EtherCAT 모션 컨트롤러입니다. SuperCAT은 EtherCAT용 ECAT-4XMO 시리즈에서 펄스열 변환 및 다양한 펄스 제어를 완벽하게 지원합니다. SuperCAT은 또한 AOI/디스펜싱 기계에 사용되는 비교 트리거 ECAT-TRG4 시리즈를 지원합니다. 125μs의 최소 사이클에서 최적의 지터 제어 기능으로 특히 반도체 및 전자 제조 산업의 버티컬 자동화 애플리케이션을 위한 동기식 I/O 성능을 최적화합니다.

SuperCAT은 다차원, 고도의 동기화, 시간 결정론적 이벤트 트리거 모션 및 I/O 제어를 위해 상용 애플리케이션 레디 기능 라이브러리 APS 를 제공합니다. 에이디링크의 APS 기능 라이브러리로 다양한 호환 가능한 타사 슬레이브를 쉽게 제어할 수 있습니다. 에이디링크의 MotionCreatorPro 2™ 유틸리티는 Microsoft® Windows™ 환경과 완벽하게 호환되어 완전한 EtherCAT 모션 및 I/O 구성과 기능 평가 는 물론 프로세스 다운로드 기능이 가능합니다.
Operating System
• Windows 10/11 32/64-bit

Processor
• x86 Atom, Core-i, or Xeon

Network requirements
• 100/1000BASE-T Ethernet port


Note:
• SuperCAT is available for different platforms.
• SuperCAT performance depends on the configuration and the technical data of the ADLINK IPC (including the processor).
• 125μs EtherCAT control cycle only guaranteed with ADLINK-specific platforms.


• Windows 10/11 32/64-bit
• x86 Atom (AHL)/Core-i/Xeon
• 100/1000 Ethernet port
.Intel PRO-1000 PCI
.Intel PRO-100 PCI
.RealTek RTL8169 PCI

클릭 하여, NIC 사양에 대해 자세히 알아보세요.
Ordering Information
  • EM-xP00
    SuperCAT virtual license for Class version
  • EM-xC00
    SuperCAT virtual license for Premium version
  • EM-xA00
    SuperCAT virtual license for Ultimate version
  • EM-xP00D
    SuperCAT dongle license for Classic version
  • EM-xC00D
    SuperCAT dongle license for Premium version
  • EM-xA00D
    SuperCAT dongle license for Ultimate version

관련 제품

  • jcb key code install
    ECAT-TRG4
    4채널 고속 위치 비교 및 트리거 모듈
  • jcb key code install
    Nu-Step DA Series
    2-Phase Stepper Drives Based on EtherCAT Field Bus
  • jcb key code install
    ES Series
    EtherCAT 슬라이스 I/O 모듈
  • jcb key code install
    APC Series
    소프트모션 컨트롤러

제품 비교하기

jcb key code install
  • 비교하기 모두 삭제

기술 리소스

  • DataSheet (2)
  • Manual (1)
  • Other Document (1)
  • Driver (4)

관련 리소스

  • Application Story
    (1.69 MB)
    【Use Case】Ensure High Quality Production of the EV Battery
  • Application Story
    (1.12 MB)
    [적용사례] EtherCAT 모션 컨트롤 솔루션
  • Application Story
    (2.87 MB)
    PLC-integrated PanKonix accelerates digitalization
  • Brochure
    (1.70 MB)
    [Flyer] EtherCAT Motion Control Solutions
  • Flyer
    (0.55 MB)
    [Flyer] SuperCAT_소프트웨어 EtherCAT 모션 컨트롤
  • WhitePaper
    (0.96 MB)
    Semiconductor Probe Test Solution

제품 비디오

연락처

  • 견적 요청
  • 이메일 보내기
  • 해외 오피스
  • 구매처
  • 회사 정보
  • 미션&비전
  • 사회 책임 정책
  • 뉴스 & 이벤트
연락처
전세계 오피스
구매처
고객 지원
기술 문의
파트너 센터
eRMA서비스
  • 소셜 네트워크
  • jcb key code install jcb key code install jcb key code install jcb key code install
개인정보 보호정책
쿠키 정책
사이트 맵
회사 소개전 세계 사무소고객 지원
  • jcb key code install
  • jcb key code install
  • jcb key code install
  • jcb key code install
Copyright © 2026 Deep Leading Pulse — All rights reserved.. All Rights Reserved.
Email: